Formula Pi track build information
Design of the Formula Pi track

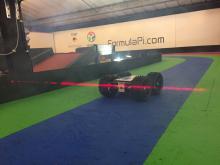
As the Formula Pi cars are using cameras to navigate around the track, we wanted to give them an easy method to detect their position. We decided on painting complete lanes rather than lines, and chose a colour scheme that would quickly show if the robots were travelling in the right direction. Hence we went with from the outside, Red, Blue, Red, Green, Blue, Green. The paint we chose was as pure red, green and blue as we could find in our local hardware store. The finish was a matt finish, so that lights around the track were not reflected, as this would complicate the lane detection.
We first started off by drawing the outline of the track. This we did in a CAD model first. Each lane is one foot wide (approx. 30.5 cm), and the corners are of varying degrees. We call these degree 1, 2 and 3. Degree 1 is simply that the radius from the inside of the track to the centre of the circle is one foot. Degree 2 is two feet, degree 3 is 3 feet. The straights are made by taking tangential lines between two corners for both the outer walls and the lanes.
Once the outline was correctly mapped out, we began to mask the track from the edge of a particular lane (we started with the inside green lane) and simply painted with a roller. In hindsight, the brightly coloured paint could have done with a white base coat. We thought the roughness of the track would help reduce glare in the image, but we aren't sure how well this worked in reality.
We masked out the inside of the track, where we would have the turntable and other items for the obstacle course. Everyone got involved in painting, and that made it a lot easier. Especially around "backbraker" - the low ceiling height straight!


We removed the masking tape once the odd lanes were dry, and started masking over these painted lanes to paint the even lanes.
The Red paint seemed especially transparent, so we added an orange undercoat. We chose orange simply as it was a similar base colour and we already had a load of orange paint lying around from a previous project.

Once finished we did some touch up painting on the occasional spill. We screwed right angle brackets on to rubber skirting. The skirting is 100mm or 150mm high and 10mm thick. This will allow the progression to faster robots, which is part of the intended future of Formula Pi.

The next part and the most expensive part of the track, was to place IP cameras that captured the action. We used four of these, connected to a PoE hub.

The cameras are switched by some python code which displays all of the camera feeds. The feed is shown in near realtime, but switched on a 2 second delay. This allows us to capture action easily. For example, we see a crash, click on that camera, and the output video stream is that of the 2 seconds up to the crash on that camera.
The camera feed is then fed to Claire's machine, where she adds her fantastic commentary and then streams this off to Twitch for the world to view.
Please check out the Formula Pi timing rig blog for information on the laser timing gates.


Comments
Geoff Riley
Fri, 03 Mar 2017 - 16:12
Permalink
A lot of hard work!
Fascinating behind the scenes view... and what a lot of really hard work you had to put in to producing the track. Seeing the initially empty space gives an much better idea of just how huge a task it was to install, it's nothing like the old OO/HO train layout that could be hinged from the chimney breast, and folded away when the space is needed!
Nope, when grandma comes to visit you she'll have to sit alongside Matilda. :)
Add new comment